Discover the Top DIY Wooden Bread Box Ideas for Your Home

Top DIY Wooden Bread Box Ideas for Your Home

The humble bread box, once a staple in every kitchen, is experiencing a resurgence in popularity. Far from being merely functional, a handcrafted wooden bread box adds a touch of rustic charm and personalized style to any home. This article explores several DIY wooden bread box ideas, guiding you through the design process, material selection, and construction techniques to create a unique and practical addition to your kitchen.

Choosing Your Bread Box Design: A Symphony of Style and Function

Before embarking on your DIY journey, consider the overall aesthetic you wish to achieve. The design of your bread box will significantly impact its final appearance and functionality. Several key factors merit careful consideration:

Style Considerations:

The style of your bread box should complement your existing kitchen décor. A rustic farmhouse kitchen might benefit from a simple, boxy design crafted from reclaimed wood, emphasizing natural imperfections. A modern, minimalist kitchen might prefer a sleek, streamlined box with clean lines and a smooth finish. Consider incorporating elements like:

  • Rustic Charm: Use distressed wood, visible knots, and a natural finish to create a vintage feel.
  • Modern Minimalism: Opt for clean lines, smooth surfaces, and a neutral color palette.
  • Shaker Style: Embrace simple, functional design with recessed panels and understated hardware.
  • Country Cottage: Incorporate decorative elements like painted floral designs or whimsical handles.

Functional Considerations:

Beyond aesthetics, the functionality of your bread box is paramount. Key functional aspects include:

  • Size and Capacity: Determine the appropriate size based on your bread consumption. A larger family will require a more substantial box.
  • Ventilation: Adequate ventilation is crucial to prevent mold and mildew. Consider incorporating air vents or slats in the design.
  • Accessibility: Ensure the bread is easily accessible without having to remove the entire lid or front panel. A hinged lid or sliding front are popular choices.
  • Material Choice: Select a wood type appropriate for food storage. Hardwoods like oak or maple are durable and less prone to warping. Cedar is naturally antimicrobial but can impart a slight aroma to the bread.

Materials and Tools: Equipping Your Workshop

Creating a high-quality wooden bread box requires careful material selection and the right tools. The following list provides a comprehensive overview:

Wood Selection:

The choice of wood significantly impacts the final product's durability and aesthetics. Consider the following options:

  • Hardwoods (Oak, Maple, Cherry): Offer superior durability and resistance to warping. They can be more expensive than softwoods.
  • Softwoods (Pine, Fir): More affordable but prone to warping if not properly sealed. Suitable for simpler designs.
  • Reclaimed Wood: Adds character and a unique touch. Ensure the wood is properly cleaned and treated before use.

Essential Tools:

A well-equipped workshop is crucial for successful woodworking. Gather the following tools:

  • Measuring Tape and Pencil: Accurate measurements are fundamental to precise cuts.
  • Circular Saw or Hand Saw: For cutting the wood to size.
  • Wood Plane or Sander: To smooth the surfaces and edges.
  • Drill and Drill Bits: For creating pilot holes and attaching hinges and handles.
  • Screwdriver: To secure the components.
  • Clamps: To hold the pieces together during assembly.
  • Wood Glue: For robust joints.
  • Wood Finish (Oil, Varnish, Paint): To protect the wood and enhance its appearance.
  • Hinges and Handles: Choose aesthetically pleasing and functional hardware.

Construction Techniques: Bringing Your Vision to Life

Several construction techniques can be employed, ranging from simple box designs to more elaborate creations. The specific method will depend on your chosen design and skill level.

Simple Box Design:

This is a great starting point for beginners. It involves cutting the wood to size, assembling the sides, bottom, and top, and attaching a hinged lid or a sliding front. Ensure all joints are well-glued and secured with screws for extra stability. Properly sealing the wood is essential to prevent warping and moisture damage. Consider adding ventilation slats to the sides or bottom.

More Advanced Designs:

More experienced woodworkers may opt for more complex designs incorporating dovetail joints, mortise and tenon joints, or intricate carving. These techniques enhance the structural integrity and aesthetic appeal. Detailed plans and instructions can be found online or in woodworking books. Remember to meticulously plan your cuts and ensure accurate measurements to achieve precise joinery.

Finishing Touches: Enhancing the Aesthetics

Once the bread box is assembled, the finishing touches add the final flourish. This stage encompasses sanding, applying a protective finish, and adding hardware.

Sanding and Finishing:

Thorough sanding is essential to achieve a smooth surface. Start with coarser grit sandpaper and gradually progress to finer grits. Apply a protective finish like oil, varnish, or paint to protect the wood from moisture and enhance its durability and appearance. Multiple coats may be necessary for optimal protection.

Hardware Selection and Installation:

Choose hinges and handles that complement the bread box's style. Install the hinges securely, ensuring smooth operation of the lid or front. Attach the handles firmly, ensuring they are positioned for comfortable use. Consider adding decorative elements like metal accents or custom-made handles to further personalize your bread box.

Safety Precautions: Working with Wood Safely

Woodworking involves potential hazards. Always prioritize safety by taking the following precautions:

  • Wear safety glasses: To protect your eyes from flying debris.
  • Use hearing protection: When operating power tools.
  • Work in a well-ventilated area: To avoid inhaling dust and fumes from finishes.
  • Keep your work area clean and organized: To prevent accidents.
  • Follow the manufacturer's instructions for all tools and materials: To ensure safe operation.

Creating a DIY wooden bread box is a rewarding project that combines creativity, craftsmanship, and functionality. By carefully considering the design, selecting appropriate materials, and employing safe construction techniques, you can craft a unique and beautiful addition to your kitchen that will be enjoyed for years to come.
Share:

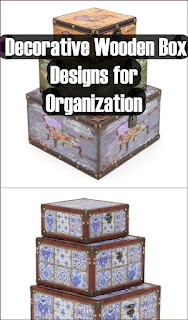
Decorative Wooden Box Designs for Organization

Unlocking Style and Organization: Decorative Wooden Box Designs

Tired of clutter disrupting your home's aesthetic appeal? Imagine a world where organization isn't a chore, but a stylish statement. Decorative wooden boxes offer a charming and functional solution, transforming chaotic spaces into havens of order and beauty. From rustic farmhouse charm to sleek modern minimalism, the versatility of wooden boxes allows you to curate a storage solution that perfectly complements your existing décor while effectively taming the clutter monster.

Exploring the Versatility of Wooden Boxes

The beauty of decorative wooden boxes lies in their adaptability. They transcend mere storage containers; they become integral parts of your interior design. Consider a set of intricately carved boxes showcasing your precious jewelry collection on a vanity. Or perhaps a stack of rustic, painted boxes corralling office supplies on a desk, adding a touch of country charm to your workspace. The possibilities are truly endless. Their adaptability extends to various rooms: a bathroom can benefit from elegant boxes storing toiletries; a living room can showcase decorative items in handcrafted wooden containers; and a bedroom can utilize them for storing clothing accessories or other personal items.

Design Styles to Suit Every Taste

Rustic Charm: Embrace the Natural Beauty

Embrace the raw, natural beauty of wood with rustic-style boxes. Think distressed finishes, visible wood grain, and perhaps even the addition of metal accents for a touch of vintage flair. These boxes exude warmth and character, perfectly complementing farmhouse, cottage, or bohemian interiors. Look for boxes made from reclaimed wood for an even more sustainable and authentic feel. Consider adding personalized touches, such as hand-painted designs or initials, to truly make them your own.

Modern Minimalism: Clean Lines and Sleek Aesthetics

For those who appreciate clean lines and uncluttered spaces, minimalist wooden boxes are the perfect choice. These boxes often feature simple geometric shapes, smooth surfaces, and neutral colors like white, gray, or black. They seamlessly integrate into modern and contemporary interiors, providing a stylish way to keep belongings organized without sacrificing aesthetic appeal. Opt for boxes made from high-quality wood, such as oak or maple, to ensure durability and longevity.

Intricate Carvings: A Touch of Artistic Flair

Elevate your storage game with intricately carved wooden boxes. These exquisite pieces become works of art themselves, adding a touch of sophistication and personality to any room. Look for boxes featuring delicate floral patterns, geometric designs, or even scenes from nature. These boxes are perfect for showcasing treasured items or adding a focal point to a shelf or dresser. They’re also a wonderful option for gifting, adding a truly unique and memorable touch.

Beyond Aesthetics: The Practical Benefits

Beyond their aesthetic appeal, decorative wooden boxes offer several practical benefits:

  • Organization: They efficiently corral items, preventing clutter and promoting tidiness.
  • Protection: They safeguard delicate belongings from dust, scratches, and damage.
  • Durability: High-quality wooden boxes are built to last, offering a long-term storage solution.
  • Versatility: They can be used in countless settings and to store a wide variety of items.

By carefully considering your personal style and storage needs, you can select decorative wooden boxes that enhance your living spaces while effectively organizing your belongings. The result? A beautifully organized home that reflects your unique personality and taste.

Share:

Customizable DIY Wooden Bread Box Ideas for Personalized Designs

Unleash Your Inner Carpenter: Customizable DIY Wooden Bread Box Ideas

Hey there, fellow bread lovers! Are you tired of those boring, mass-produced bread boxes? Do you dream of a bread storage solution that's as unique and charming as your kitchen? Then grab your tools and let's dive into the wonderfully rewarding world of DIY wooden bread boxes! We're going to explore some fun, customizable designs that will not only keep your bread fresh but also add a touch of personal style to your home.

Why DIY Your Bread Box?

Let's be honest, store-bought bread boxes can be…blah. They often lack personality and don't always fit the aesthetic of your kitchen. Building your own, on the other hand, offers a ton of advantages:

  • Complete Customization: You get to choose the wood type, the size, the finish, even the little quirky details!
  • Unique Style: No more cookie-cutter designs. Your bread box will be a one-of-a-kind statement piece.
  • Cost-Effective (Usually!): While the initial investment in tools might seem hefty, you'll likely save money in the long run, especially if you already own some basic woodworking tools.
  • Sense of Accomplishment: There's nothing quite like the satisfaction of creating something beautiful and functional with your own two hands.
  • A Fun Project!: It's a fantastic way to spend a weekend, get creative, and maybe even learn a new skill.

Design Inspiration: From Rustic Charm to Modern Minimalism

The beauty of a DIY bread box is its versatility. You can adapt the design to perfectly match your kitchen's style. Let's explore some inspiring ideas:

Rustic Farmhouse Style

Think reclaimed wood, distressed finishes, and simple, clean lines. You could incorporate metal handles or hinges for a touch of industrial flair. Maybe even add some charming stenciling or a personalized inscription!

Modern Minimalist Design

For a sleek, contemporary look, opt for smooth, unadorned wood like maple or birch. Keep the design simple and geometric, focusing on clean lines and a minimalist color palette. A simple, flush-mounted latch would complement this style perfectly.

Shabby Chic Elegance

Embrace a softer, more romantic aesthetic with a painted bread box. Pastel colors, delicate floral designs, or even decoupage techniques can add a touch of whimsical charm. Consider using distressed paint for a more aged look.

Coastal/Beach Style

Bring the beach indoors with a light-colored wood, perhaps with a slightly weathered finish. Consider adding rope details or nautical-inspired hardware. A subtle sea-glass green or light blue paint could add to the coastal vibe.

Essential Materials and Tools

Before you jump in, gather your supplies! The exact materials will depend on your chosen design, but here's a general list:

  • Wood: Choose a wood type that's suitable for your project and complements your desired style. Pine, cedar, oak, and maple are all popular choices.
  • Wood Glue:
  • Wood Screws:
  • Sandpaper (various grits):
  • Wood Finish (stain, paint, varnish, etc.):
  • Hardware (hinges, latches, handles):
  • Measuring Tape:
  • Saw (hand saw, circular saw, jigsaw):
  • Drill:
  • Screwdriver:
  • Clamps:
  • Safety Glasses:
  • Dust Mask (especially when sanding):

Step-by-Step Guide (Simplified):

This is a simplified overview. The exact steps will vary depending on your design and chosen materials. Always consult detailed plans or tutorials for the specific design you choose.

  1. Design and Planning: Sketch out your bread box design, including dimensions and details.
  2. Cut the Wood: Cut the wood pieces according to your plan. Use a saw appropriate for the type of wood you're using.
  3. Assemble the Box: Join the wood pieces using wood glue and screws. Use clamps to hold everything in place while the glue dries.
  4. Sanding: Sand all surfaces thoroughly to create a smooth finish. Start with coarser grit sandpaper and gradually move to finer grits.
  5. Apply Finish: Apply your chosen finish (stain, paint, varnish) according to the manufacturer's instructions. Allow ample drying time between coats.
  6. Attach Hardware: Install hinges, latches, and handles. Ensure they are securely fastened.

Adding Your Personal Touch

This is where the fun really begins! Here are some ideas to personalize your bread box:

  • Carving or Burning Designs: Add intricate carvings or pyrography for a truly unique touch.
  • Painting and Stenciling: Use paint and stencils to create custom designs or patterns.
  • Decoupage: Attach decorative paper or fabric to the surface of the bread box.
  • Inlay Work: Create beautiful inlays using contrasting wood species.
  • Personalized Engraving: Add a monogram or a special date for a sentimental keepsake.

Commonly Asked Questions

Q: What type of wood is best for a bread box?

A: Many woods work well! Pine, cedar, oak, and maple are popular choices. Consider factors like durability, workability, and aesthetic appeal.

Q: How do I prevent the bread from getting stale?

A: Good airflow is key. Ensure your bread box has adequate ventilation to prevent moisture buildup.

Q: Do I need special tools?

A: Basic woodworking tools are sufficient for many designs. However, more complex designs may require specialized tools.

Q: How long does it take to build a bread box?

A: The time required depends on the complexity of the design and your experience level. Simple designs can be completed in a weekend, while more intricate projects may take longer.

Q: Where can I find plans for DIY bread boxes?

A: You can find many free plans online, on sites like Pinterest, Instructables, and various woodworking blogs. You can also purchase plans from woodworking websites.

So, are you ready to get crafting? Remember, the most important ingredient is your creativity! Have fun, enjoy the process, and don't be afraid to experiment. Your one-of-a-kind DIY wooden bread box awaits!

Share:

Wooden Box DIY Ideas for Stylish Nightstand Storage

Elevating Nightstand Aesthetics: A Comprehensive Guide to Stylish Wooden Box DIY Projects

The humble nightstand, often overlooked in interior design schemes, serves as a pivotal point in any bedroom. Its functionality extends beyond mere surface area; it acts as a repository for personal items, requiring both practicality and aesthetic appeal. This guide delves into the art of crafting stylish wooden box storage solutions for your nightstand, transforming a potentially cluttered space into a haven of organized elegance. We will explore various design approaches, focusing on DIY projects that enhance both functionality and the overall visual harmony of your bedroom.

Choosing the Right Wood and Materials

The success of any DIY project hinges on selecting appropriate materials. For nightstand storage boxes, the choice of wood significantly impacts the final aesthetic and durability. Consider the following factors when making your selection:

Wood Species Selection

A range of wood species offers diverse characteristics. Hardwoods like oak, walnut, and cherry boast strength, durability, and rich grain patterns, contributing to a luxurious feel. These woods are ideal for projects requiring robust construction and a timeless aesthetic. However, they often command a higher price point. Softwoods such as pine and fir provide a more affordable option, offering ease of workability. Their lighter color palettes lend themselves to a variety of finishing techniques, allowing for customization. While less durable than hardwoods, proper treatment can significantly enhance their longevity. The choice ultimately rests on budget, aesthetic preference, and desired level of project complexity.

Hardware Considerations

Beyond the wood itself, the hardware chosen plays a crucial role in the overall design. Handles and hinges should complement the chosen wood and the overall style of your bedroom. Consider the following options:

  • Antique brass or copper handles evoke a vintage charm, particularly suitable for rustic or traditional bedroom styles.
  • Modern minimalist handles, often crafted from brushed nickel or stainless steel, lend a sleek, contemporary feel.
  • Leather pulls or straps add a touch of rustic elegance, enhancing the overall texture of the wooden box.
  • Concealed hinges maintain a clean, uncluttered aesthetic, ideal for a minimalist design.

Ensure that the chosen hardware is of high quality and appropriately sized for the dimensions of your wooden boxes.

Design Concepts: From Rustic Charm to Modern Minimalism

The design of your wooden nightstand boxes allows for a remarkable degree of personalization. Explore these diverse styles to find the perfect match for your bedroom's existing décor:

Rustic Charm: Reclaimed Wood and Natural Finishes

Utilizing reclaimed wood imbues the boxes with a unique character, telling a story through its weathered appearance. Natural finishes, such as beeswax or linseed oil, enhance the wood’s natural beauty without obscuring its unique grain patterns. These boxes effortlessly complement a rustic or farmhouse-style bedroom. Consider adding decorative elements such as iron hinges or rope handles to further enhance the rustic aesthetic.

Modern Minimalism: Clean Lines and Simple Aesthetics

Modern minimalist designs prioritize clean lines and simple forms. Opt for a light-colored wood, such as birch or maple, finished with a clear coat to showcase its natural grain. Minimalist hardware, such as small, flush-mounted handles, complements the overall aesthetic. The focus is on functionality and understated elegance, creating a sense of calm and serenity in the bedroom.

Coastal Elegance: Light Woods and Nautical Accents

For a coastal-inspired aesthetic, choose light-colored woods such as pine or driftwood. A whitewash or light-grey paint finish enhances the airy feeling. Incorporate nautical accents, such as rope handles or small brass portholes (for decorative purposes only), to enhance the maritime theme. This style evokes a sense of relaxation and tranquility, perfect for a seaside-inspired bedroom.

Step-by-Step Guide to Creating a Simple Wooden Box

This section outlines the construction of a basic wooden box, providing a foundation for more elaborate designs. Remember to always prioritize safety and utilize appropriate safety equipment.

Materials Needed

  • Wooden planks (choose your preferred wood and thickness)
  • Wood glue
  • Wood screws
  • Sandpaper (various grits)
  • Wood stain or paint (optional)
  • Clear sealant (optional)
  • Handles or knobs (optional)
  • Measuring tape
  • Saw (mitre saw recommended for precise cuts)
  • Drill
  • Screwdriver

Construction Steps

  1. Measure and cut the wood: Cut the wooden planks to the desired dimensions for the sides, top, and bottom of the box. Ensure accurate measurements for a well-fitting construction.
  2. Assemble the box: Apply wood glue to the edges of the planks and assemble the box, ensuring the corners are square and aligned. Secure the joints with wood screws, countersinking them slightly to allow for a smooth finish.
  3. Sand the box: Once the glue has dried, sand the entire box using progressively finer grits of sandpaper. This removes any rough edges and prepares the surface for finishing.
  4. Apply finish: Apply wood stain or paint according to the manufacturer's instructions. Allow the finish to dry completely before applying a clear sealant to protect the wood.
  5. Attach hardware: Drill pilot holes for any handles or knobs and securely attach them to the box.

Beyond the Basics: Advanced Techniques and Design Enhancements

Once you've mastered the construction of a basic wooden box, consider incorporating these advanced techniques to elevate your designs:

Inlay Work

Introducing contrasting wood species or other materials as inlay creates visually striking patterns and textures.

Carving and Engraving

Adding carved or engraved designs adds a unique artistic touch, reflecting personal style and preferences.

Adding Compartments and Dividers

Dividers allow for better organization within the box, enhancing functionality.

By exploring these diverse design approaches and techniques, you can transform simple wooden boxes into exquisite, functional additions to your nightstand, elevating both its aesthetic appeal and practicality. Remember that the most successful projects are those that reflect your personal style and preferences, creating a bedroom that is both beautiful and uniquely your own.

Share:

Wooden Box DIY Ideas for Decorative Table Pieces

Unleash Your Creativity: Stunning Wooden Box DIYs for Decorative Table Pieces

Transform ordinary wooden boxes into extraordinary decorative table pieces with these inspiring DIY projects. Whether you're a seasoned crafter or a complete beginner, these ideas offer something for everyone, promising unique and personalized additions to your home décor. Forget generic store-bought items â€" let's create something truly special!

Rustic Charm: The Herb Garden Box

Embrace the beauty of nature with a charming herb garden box. Start by selecting a shallow, rectangular wooden box. Sand it down smoothly for a flawless finish, then apply a coat of natural stain or paint for a rustic appeal. Once dry, carefully drill small drainage holes in the base. Fill the box with high-quality potting soil and plant a variety of fragrant herbs, like rosemary, thyme, and mint. Arrange them aesthetically, and consider adding small decorative stones or pebbles for visual interest. For extra flair, add a miniature wooden sign with the names of the herbs. This delightful piece adds a touch of rustic elegance and the lovely scent of fresh herbs to any table setting.

Elegant Elegance: The Painted Floral Box

Add a touch of sophistication to your décor with a beautifully painted floral box. Choose a square or rectangular wooden box and prime it with a high-quality primer. Select your favorite colors and create a stunning floral design. Consider using stencils for a crisp look, or unleash your artistic talent with freehand painting. Use different brush techniques and layer the paints to add depth and dimension. Once the paint is dry, you can apply a clear varnish or sealant to protect your artwork and enhance its vibrancy. This elegant piece will certainly add a touch of artistry to your coffee table or side table.

Tips for Success:

  • Use high-quality acrylic paints for vibrant colors and easy application.
  • Let each paint layer dry completely before applying the next.
  • Consider adding a delicate gold or silver leafing detail for an extra touch of luxury.

Modern Minimalism: The Geometric Box

Embrace modern minimalism with a geometrically designed wooden box. Start with a clean, simple wooden box. Select two or three contrasting paint colors. Use painter's tape to create sharp lines and geometric shapes on the box. Experiment with stripes, chevrons, or other bold geometric patterns. Once the paint is dry, carefully remove the tape, revealing clean, precise lines. Seal the design with a clear coat for lasting durability. This striking piece perfectly complements a contemporary interior style and provides a sophisticated contrast against other textures and colors on your table.

Beyond the Basics: Adding Personal Touches

Personalize your wooden box to truly reflect your unique style. Consider incorporating these additional elements:

  • Decoupage: Add colorful paper, fabric scraps, or even vintage maps to create a unique collage.
  • Embellishments: Incorporate beads, sequins, buttons, or other small decorative items.
  • Metal Hardware: Upgrade the box's hinges, latches, or handles with decorative hardware.
  • Chalkboard Paint: Transform the top of the box into a miniature chalkboard for writing messages or notes.

With a little creativity and these inspiring ideas, you can transform simple wooden boxes into stunning decorative table pieces that reflect your personality and enhance your home's ambiance. So grab your tools, unleash your creativity, and get crafting!

Share:

Wooden Box DIY Ideas for Decorative Wall Shelves

Unleash Your Inner Artisan: DIY Wooden Box Wall Shelves

Transform ordinary wooden boxes into extraordinary wall-mounted shelves with these creative DIY projects. Forget boring, mass-produced décor; these unique designs add personality and rustic charm to any room. Whether you're a seasoned DIY enthusiast or a complete beginner, these projects offer varying levels of complexity to suit your skillset. Get ready to upcycle, personalize, and proudly display your handiwork!

Rustic Charm: The Simple Single Box Shelf

This project provides the perfect entry point for novice DIYers. Start by selecting a sturdy wooden box â€" a vintage crate adds extra character. Sand the box thoroughly to achieve a smooth surface, removing any splinters or imperfections. Consider staining or painting the box to complement your existing décor. A simple coat of white paint creates a clean, minimalist look, while a darker stain enhances the wood's natural grain. Once dry, attach sturdy brackets to the back of the box, ensuring they are evenly spaced and securely fastened. Finally, mount the brackets to the wall using appropriate screws. Add some small decorative items to instantly create a functional and visually appealing shelf.

Layered Luxury: A Multi-Box Masterpiece

For a more ambitious project, create a stunning layered shelf using multiple wooden boxes of varying sizes. Begin by carefully measuring and planning the arrangement. Consider staggering the boxes for a visually interesting effect. You might opt for a symmetrical design, or embrace asymmetry for a more organic, bohemian feel. Sand and finish each box individually, ensuring consistency in your chosen treatment (paint, stain, or varnish). Attach sturdy brackets to the back of each box, paying close attention to placement to ensure proper support and alignment. Mount the boxes onto the wall, starting with the largest or most central box and working your way outwards. You can further personalize this by adding different wallpapers or fabrics to the back of some of the boxes, creating unique textural elements.

Tips for Success:

  • Use high-quality wood glue and screws for secure fastening.
  • Pre-drill pilot holes to prevent the wood from splitting.
  • Level each box carefully to ensure a clean and professional finish.
  • Consider adding felt pads to the bottom of the boxes to protect your walls.

Beyond the Basics: Incorporating Extra Elements

Take your DIY skills to the next level by incorporating additional elements into your wooden box shelves. Consider adding rope or leather straps for a rustic, industrial look, attaching them to the sides of the boxes and using them as extra decorative features. You could also add small metal handles for a touch of elegance. Alternatively, create a unique shelving unit with a mix of boxes and repurposed materials. Incorporating metal piping or reclaimed wood alongside your wooden boxes creates a mixed-media masterpiece that demonstrates a distinctive design aesthetic. Don't be afraid to experiment and personalize your design to reflect your style. The possibilities are truly endless.

With a little creativity and these simple steps, you can easily transform ordinary wooden boxes into beautiful and functional wall shelves. So grab your tools, embrace your inner artist, and get ready to add a touch of rustic charm to your home!

Share:

Classic Wooden Box Designs for Timeless Charm

Classic Wooden Box Designs for Timeless Charm

Wooden boxes. They whisper stories of generations past, of handcrafted artistry and enduring elegance. More than mere containers, they are vessels of memory, holding cherished keepsakes and adding a touch of rustic charm to any space. From the simple elegance of a Shaker design to the intricate carvings of a Victorian masterpiece, the world of wooden boxes offers a vast spectrum of styles, each boasting its unique appeal and enduring quality. This exploration delves into the classic designs that continue to captivate us with their timeless charm.

The Enduring Allure of Shaker Simplicity

Shaker boxes, with their clean lines and unadorned surfaces, epitomize minimalist design at its finest. Functionality reigns supreme in these creations. Crafted from readily available wood like pine or maple, these boxes are renowned for their exquisite joinery, often employing techniques passed down through generations. The subtle variations in wood grain become the focal point, highlighting the natural beauty of the material. Their understated elegance makes them perfect for storing small items, adding a touch of refined simplicity to any setting. The lack of ornamentation doesn't mean a lack of artistry; instead, it represents a mastery of precision and a commitment to clean, functional design.

Key Characteristics of Shaker Boxes:

  • Simple, geometric forms.
  • Minimalist aesthetic, devoid of ornamentation.
  • Expert joinery, often using dovetail or rabbet joints.
  • Typically made from light-colored woods like pine or maple.

The Intricate Beauty of Victorian Carvings

In stark contrast to the Shaker aesthetic, Victorian wooden boxes explode with intricate detail. These opulent pieces often showcase elaborate carvings, inlaid designs, and sumptuous veneers. Think swirling floral patterns, mythical creatures, and geometric motifs, all meticulously executed. Materials were chosen for their luxurious appeal, including richly figured mahogany, ebony, and rosewood. These boxes weren't just for storage; they were statement pieces, reflecting the wealth and refined taste of their owners. The craftsmanship involved is breathtaking, a testament to the skill of the artisans who painstakingly created these miniature works of art. Opening one reveals not only its contents but also a glimpse into a bygone era of opulence and artistic expression.

Defining Features of Victorian Boxes:

  • Intricate carvings and inlaid designs.
  • Use of rich, dark woods like mahogany, ebony, and rosewood.
  • Often adorned with brass hinges and clasps.
  • Typically feature more ornate and decorative elements compared to Shaker designs.

Beyond the Styles: Choosing Your Perfect Wooden Box

Whether you gravitate towards the understated elegance of a Shaker box or the lavish detail of a Victorian piece, selecting the right wooden box is a personal journey. Consider the intended use: Will it hold precious jewelry, vintage photographs, or simply add a touch of rustic charm to your bookshelf? The size, wood type, and level of ornamentation should all align with your personal style and the space where it will reside. Ultimately, the perfect wooden box transcends mere functionality; it becomes a cherished object, a reflection of your taste, and a piece of history you'll treasure for years to come. Embrace the timeless charm of these classic designs and let them add a touch of enduring elegance to your life.

Share:

Népszerű bejegyzések

Search This Blog

Üzemeltető: Blogger.

Blog Archive

Recent Posts