How to Make Wooden Magazine Holders for Organization

Constructing Functional and Aesthetic Wooden Magazine Holders for Enhanced Organization

Maintaining an organized living space contributes significantly to both mental clarity and aesthetic appeal. Clutter, particularly in high-traffic areas, can detract from the overall ambiance. A practical solution for managing the accumulation of periodicals and brochures is the construction of a custom wooden magazine holder. This detailed guide outlines the process of crafting a functional and visually appealing wooden magazine holder, catering to various skill levels and design preferences.

Planning and Design Considerations

Before embarking on the construction process, meticulous planning is crucial to ensure a successful outcome. This phase involves determining the desired dimensions, selecting appropriate materials, and sketching a preliminary design.

Image 2

Determining Dimensions and Capacity

The dimensions of your magazine holder will depend primarily on the size and quantity of periodicals you intend to store. Consider the average dimensions of your magazines, allowing for sufficient space to prevent overcrowding and damage. A larger holder will accommodate a greater volume, but excessive size might overwhelm the space in which it will be placed. Measure your intended location to ensure a proper fit. A practical approach is to create a prototype from cardboard to visualize the final dimensions and refine the design before proceeding to wood.

Material Selection

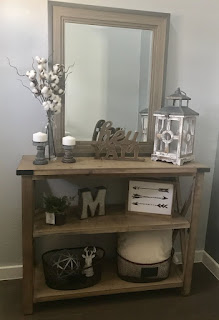
The choice of wood significantly impacts the aesthetic appeal, durability, and overall cost of your magazine holder. Hardwoods like oak, maple, or cherry offer superior strength and longevity, lending a sophisticated appearance. However, they are often more expensive and can be more challenging to work with for beginners. Softwoods such as pine or fir are more affordable and easier to cut and shape, making them an ideal choice for novice woodworkers. Consider the overall style of your home décor when making your selection. The wood’s finish will also impact the final look. Consider a natural finish to showcase the wood's grain or a painted finish for a more modern aesthetic.

Design Conceptualization and Sketching

Sketching your design on paper provides a visual representation of your intended creation before committing to the actual construction. This allows for adjustments and refinements. Consider various design elements, such as the holder's overall shape (rectangular, angular, curved), the number of compartments (single or multiple), and the incorporation of decorative features. You might explore adding elements like routed edges, decorative inlays, or a unique base design. Detailed sketches, including precise measurements for each component, are essential for accurate construction.

Tools and Materials Required

The tools and materials needed will vary depending on the design complexity and the chosen wood type. Ensure you have all necessary items before commencing the project.

Essential Tools

  • Measuring Tape and Pencil: Accurate measurements are vital throughout the process.
  • Circular Saw or Hand Saw: For cutting the wood to the desired dimensions.
  • Wood Plane or Sander: To smooth the surfaces and edges of the wood.
  • Drill and Drill Bits: For creating pilot holes before screwing components together.
  • Screwdriver or Screw Gun: To fasten the components.
  • Wood Glue: To enhance the strength and durability of the joints.
  • Clamps: To hold the components securely during gluing and assembly.
  • Safety Glasses and Dust Mask: To protect your eyes and respiratory system from debris.
  • Finishing Supplies (Sandpaper, Stain, Polyurethane): For protecting and enhancing the appearance of the finished product.

Essential Materials

  • Selected Wood: Based on your chosen design and budget.
  • Wood Screws: Appropriate size and type for the wood you are using.
  • Wood Filler (optional): To fill any gaps or imperfections.

Construction Process: A Step-by-Step Guide

This section outlines the step-by-step process of building your wooden magazine holder. Remember to always prioritize safety and wear appropriate protective gear.

Cutting and Shaping the Wood

Using your pre-determined measurements from the design phase, cut the wood planks to the required dimensions. Ensure the cuts are clean and precise to avoid inaccuracies in the final assembly. Use a circular saw for straight cuts and a jigsaw for more intricate shapes. Once cut, carefully sand all surfaces to remove any rough edges or splinters, ensuring a smooth finish for both comfort and aesthetics.

Assembling the Magazine Holder

Apply wood glue to the joining surfaces of the components, following your design plan. Carefully align the pieces and firmly clamp them together, ensuring that the joints are secure and flush. Allow sufficient time for the glue to dry completely, following the manufacturer’s recommendations. Once dry, use wood screws to reinforce the joints, ensuring that the screws are countersunk to avoid creating prominent protrusions.

Finishing Touches

Once the assembly is complete, carefully inspect for any gaps or imperfections. Use wood filler to fill any gaps or holes, allowing it to dry completely before sanding smooth. Sand the entire surface of the magazine holder to achieve a smooth and uniform finish. Apply your chosen finish, whether it's stain, paint, or polyurethane, following the manufacturer's instructions carefully. Multiple coats may be needed for optimal protection and appearance. Allow ample time for each coat to dry completely before applying the next.

Customization and Refinements

The design of your wooden magazine holder can be adapted to suit your personal preferences and style. Consider incorporating decorative elements, such as:

  • Inlays: Adding contrasting wood species or other materials to create a visually interesting pattern.
  • Carving: Simple carvings can add a touch of artistry to the design.
  • Burning: Wood burning techniques can be used to add intricate designs.
  • Painting: Adding a coat of paint or a decorative finish.

Remember to consider the overall aesthetics of your home décor when making these design choices. The finished project should seamlessly integrate into its intended environment.

Conclusion

Constructing a custom wooden magazine holder is a rewarding project that combines practicality with personalized design. By following the steps outlined in this guide, you can create a functional and visually appealing storage solution for your periodicals. Remember to prioritize safety, work meticulously, and enjoy the process of bringing your design vision to life. The result will be a unique piece that adds both organization and aesthetic charm to your living space. With a bit of patience and attention to detail, you will have created a beautiful and functional addition to your home.

Share:

DIY Wooden Wall Art Projects

Unleash Your Inner Artist: Fun & Easy DIY Wooden Wall Art Projects

Hey there, crafty friends! Are you looking to add a personal touch to your home decor without breaking the bank? Then you've come to the right place! DIY wooden wall art is a fantastic way to express your creativity, personalize your space, and have a ton of fun in the process. Forget those mass-produced prints; let's dive into some seriously awesome projects that are perfect for beginners and seasoned crafters alike!

Geometric Wonders: Creating Stunning Shapes

Geometric art is having a major moment, and it's surprisingly easy to recreate it using wood. Think clean lines, bold colors, and a modern aesthetic. Here’s how you can get started:

Simple Wooden Slice Shapes

Grab some wood slices (you can find these at craft stores or even collect them yourself on a nature walk!). Use sandpaper to smooth out the edges, then get creative with paint! Think contrasting colors, ombre effects, or even metallic accents. You can arrange them in a visually appealing pattern on your wall â€" a simple grid, a staggered arrangement, or something totally unique.

Building Block Art

This one is great for playing with texture and color. Find some unfinished wooden blocks (again, craft stores are your friend!) and paint them in various colors or patterns. You can even stain them for a more rustic look. Arrange them on your wall to create a visually stunning geometric composition. Consider adding small hooks to the blocks for functionality - perhaps to hang keys or jewelry.

Layered Wooden Shapes

For a more complex but rewarding project, try creating layered shapes. Cut out various shapes â€" circles, squares, triangles â€" from different thicknesses of wood. Paint them in complementary colors and layer them to create depth and dimension. Experiment with different layering techniques to achieve unique results. You could even add a bit of 3D effect by adding small spacers between the layers.

Rustic Charm: Embrace the Natural Beauty of Wood

If you're a fan of rustic and farmhouse style, these projects will totally float your boat. The beauty of wood lies in its natural imperfections, so embrace them!

Reclaimed Wood Signs

Give old wooden pallets or reclaimed boards a new life! Sand them down, clean them up, and then personalize them with stencils, paint, or even burnt designs. Create a custom sign with a favorite quote, a family name, or a witty saying. The slightly weathered look adds so much character.

Driftwood Art

If you live near the coast, you're in for a treat! Collect some interesting pieces of driftwood and arrange them into a unique wall hanging. You can leave them in their natural state or give them a light sanding and a coat of sealant to protect them. This project is all about letting the natural beauty of the driftwood shine through.

Wood Slice Wall Clock

Combine functionality with rustic charm by creating a wood slice wall clock. Find a large, relatively flat wood slice and carefully attach clock hands and a clock mechanism to the back. You can stain or paint the wood slice to match your décor, or leave it natural. It's a beautiful and unique addition to any room.

Beyond the Basics: More Creative Wooden Wall Art Ideas

Ready to push your creative boundaries? Let's explore some more advanced (but still achievable!) projects:

Wooden Pallet Wall Hanging

Turn an old pallet into a stunning wall hanging. Clean and sand the pallet, then add layers of paint, stencils, or decoupage for a personalized look. You can even incorporate other materials like fabric scraps, buttons, or beads. The possibilities are truly endless!

Wood Burning Designs

Wood burning is a fantastic way to add intricate detail to your wooden wall art. With a wood burning tool, you can create stunning designs, quotes, or even portraits. Practice on some scrap wood first, and remember to always prioritize safety!

Mixed Media Wall Art

Don't be afraid to experiment with different materials! Combine wood with fabric, metal, paper, or even found objects to create a truly unique and eclectic piece of wall art. Let your imagination run wild and create something that truly reflects your personality.

Finishing Touches: Tips for Success

No matter which project you choose, remember these finishing touches for a professional look:

  • Sanding is key: Always sand your wood thoroughly to create a smooth surface before painting or staining.
  • Prime your wood: Using a primer will help your paint or stain adhere better and create a more even finish.
  • Seal your masterpiece: Protect your artwork from moisture and wear by applying a sealant.
  • Use high-quality materials: Investing in good quality paints, stains, and sealants will make a big difference in the final result.
  • Have fun! Remember, these are DIY projects, so don’t be afraid to experiment and make mistakes. It's all part of the learning process.

Frequently Asked Questions

Q: What type of wood is best for DIY wall art?

A: Many readily available woods work great! Pine, plywood, and even reclaimed wood are all popular choices. Choose a wood type that suits your project's style and your skill level.

Q: What kind of paint should I use?

A: Acrylic paints are generally a good choice for wood projects due to their durability and ease of use. Consider using a paint specifically designed for wood.

Q: How do I protect my finished artwork?

A: Apply a clear sealant after painting or staining to protect your artwork from moisture and scratches. Polyurethane is a popular choice.

Q: Where can I find supplies?

A: Craft stores like Michaels, Hobby Lobby, and Joann Fabrics are excellent resources. You can also find supplies online or even repurpose materials from around your home.

Q: What if I'm not very crafty?

A: Don’t worry! Many of these projects are beginner-friendly. Start with a simpler project and gradually build your skills and confidence. There are tons of tutorials online if you need some extra guidance.

Happy crafting everyone! I can't wait to see the amazing wooden wall art you create!

Share:

How to Build a Modern Console Table for Your Entryway

Constructing a Contemporary Console Table for the Entryway: A Comprehensive Guide

The entryway, often the first space guests encounter, presents a unique opportunity to establish the aesthetic tone of a home. A well-designed console table serves not only as a functional piece of furniture but also as a statement piece, enhancing the overall ambiance. This comprehensive guide meticulously details the process of building a modern console table, emphasizing precision, craftsmanship, and the incorporation of contemporary design elements.

Phase I: Planning and Design

Before commencing construction, a thorough planning phase is crucial. This involves determining the desired dimensions, selecting appropriate materials, and sketching a detailed design. Neglecting this preliminary step often leads to inconsistencies and compromises in the final product.

1. Defining Dimensions and Functionality:

The dimensions of your console table should be carefully considered in relation to the available space in your entryway. Measure the area precisely to ensure a harmonious fit. Determine the desired length, width, and height, bearing in mind both aesthetic appeal and practical considerations. Will the table primarily serve as a display surface for decorative items, a place for keys and mail, or a combination of both? These functional requirements will influence the design and material choices.

2. Material Selection:

The choice of materials significantly impacts the overall aesthetic and durability of the console table. Wood, with its natural beauty and versatility, is a popular choice. Hardwoods like oak, walnut, or maple offer exceptional strength and longevity, while softer woods like pine can be more readily worked but may require additional protection. Metal, particularly steel or iron, provides a modern, industrial feel and can be combined with wood for a visually striking contrast. Concrete, though more demanding to work with, offers a unique textural element and a sense of robust modernity. Finally, consider materials for the top surface, potentially using materials like marble, glass, or even reclaimed wood for a unique finish.

3. Sketching the Design:

Creating detailed sketches is paramount. These sketches should include precise measurements, detailing the dimensions of the table's legs, top, and any shelves or drawers. Illustrate the joinery methods â€" whether you'll employ mortise and tenon, dowels, or other techniques â€" to ensure a structurally sound and visually pleasing design. Consider the overall style: will it be minimalist, mid-century modern, or incorporate other contemporary elements? Explore various leg designs, top shapes, and other features to find the perfect balance of form and function.

Phase II: Material Acquisition and Preparation

Once the design is finalized, the next stage involves sourcing the necessary materials and preparing them for construction. This meticulous phase is essential for ensuring the project's success.

1. Sourcing Materials:

Procure all necessary materials from reputable suppliers. For wood, select lumber that is properly seasoned and free of defects like knots or cracks. If using metal, ensure it is appropriately sized and treated for corrosion resistance. Choose hardware â€" screws, bolts, hinges, etc. â€" of high quality to ensure durability. Consider purchasing pre-finished materials or planning for finishing later in the process to account for drying and sanding times. Account for potential waste and buy extra material to allow for errors.

2. Material Preparation:

Before beginning construction, prepare the materials according to the specific needs of your chosen materials and the project's requirements. Wood requires cutting to precise dimensions, sanding to remove imperfections and create a smooth surface, and potentially planing to ensure even thickness. Metal might require cutting, welding, or bending depending on the design. Concrete requires precise mixing and forming. Each material presents unique preparation challenges that must be addressed with care and precision.

Phase III: Construction

This phase involves the meticulous assembly of the console table according to the pre-determined design. Accuracy and attention to detail are critical in this stage.

1. Leg Assembly:

Begin by constructing the legs. If using wood, employ appropriate joinery techniques such as mortise and tenon, dowel joints, or biscuit joints for strength and stability. Ensure that the legs are perfectly square and plumb. If using metal, weld or bolt the components together, ensuring precise alignment and strong welds.

2. Frame Construction:

Assemble the frame that connects the legs, creating the base of the console table. This frame provides structural integrity and supports the table's top. Use the chosen joinery methods to secure the frame components, ensuring that it is square and level. Reinforce the joints with appropriate fasteners, such as screws or bolts, for enhanced stability.

3. Top Attachment:

Attach the table's top to the frame. This can involve using screws, bolts, or specialized fasteners designed for attaching different material types to wood. Ensure the top is securely fastened and level. If the top is made of a heavy material like concrete or stone, additional support might be necessary.

4. Finishing Touches:

Once the primary structure is complete, add any finishing touches such as shelves or drawers. If building drawers, ensure they slide smoothly and are properly aligned. Sand any rough edges and apply any necessary finishes, such as paint, stain, or varnish, to protect the wood and enhance its appearance. Allow ample drying time for finishes before moving the table.

Phase IV: Finishing and Installation

The final phase involves the application of finishing coats and the installation of the console table in the entryway.

1. Finishing:

Apply several coats of your chosen finish, allowing each coat to dry completely before applying the next. Sand lightly between coats to ensure a smooth, even surface. Choose a finish that complements the chosen material and desired aesthetic. A high-quality finish protects the wood from moisture damage and enhances its appearance.

2. Installation:

Carefully position the console table in the entryway, ensuring it is level and stable. Use shims if necessary to adjust for uneven floors. Add any decorative elements, such as lamps, plants, or artwork, to complete the look.

By meticulously following these steps, you can successfully construct a modern and functional console table that will enhance the aesthetic appeal of your entryway for years to come. Remember that patience, precision, and attention to detail are crucial throughout the entire process. The resulting piece will not only serve its practical purpose but also stand as a testament to your craftsmanship and design vision.

Share:

Step-by-Step Cajon Drum Instructions for Beginners

Unlock Your Inner Rhythm: A Beginner's Guide to Playing the Cajon

The cajon, that captivating box-shaped percussion instrument, offers a surprisingly diverse range of sounds and is surprisingly easy to learn! Forget complicated drum kits; with a little practice, you’ll be tapping out infectious rhythms. This guide provides a step-by-step approach, perfect for absolute beginners. Prepare to unleash your inner percussionist!

Getting Started: Posture and Grip

Before you even strike a note, proper posture is key. Sit comfortably on a chair or stool, ensuring your back is straight and your shoulders relaxed. This allows for optimal control and prevents strain. Now, place the cajon between your legs, slightly angled forward. Experiment with different angles until you find one that feels comfortable and allows you to reach all playing surfaces easily. Your hands will be your primary tools; keep them relaxed, not tense.

Finding Your Sounds: The Basic Beats

The cajon’s beauty lies in its versatility. Different playing techniques produce diverse sounds. Let's start with the basics:

  • Slap: Use the flat of your hand, striking the center of the cajon's front surface with a swift, decisive motion. This creates a sharp, resonant "bass" sound. Practice varying the force of your slap to control the volume and intensity.
  • Tap: Use your fingertips to gently tap the cajon’s surface. This produces a higher-pitched, softer sound, ideal for accents and melodic fills. Explore tapping different areas for subtle tonal variations.
  • Bass Slap with Finger Snare: For a more complex sound, combine a bass slap with a quick snare sound. After the bass slap, immediately flick your fingers along the edge of the cajon to create a snappy "snare" effect. Practice this combination until it feels natural and fluid.

Expanding Your Repertoire: Beyond the Basics

Once you've mastered the slap, tap, and bass slap with finger snare, it's time to explore the cajon's full sonic potential. Experiment with:

  • Ghost Notes: These are very soft, subtle taps or slaps, used to add texture and rhythmic complexity without overwhelming the main beat. Practice varying the volume and pressure to create a dynamic feel.
  • Finger Rolls: Use your fingers to create quick, rolling patterns across the surface of the cajon. Start with simple rolls, then gradually increase the speed and complexity as your coordination improves. Try rolling with both hands simultaneously, or alternating between hands.
  • Muted Slap: By slightly cupping your hand, you can create a softer, more muffled slap. This is great for creating a “subdued” feel during certain musical passages.

Putting It All Together: Practicing Rhythms

The best way to truly learn the cajon is to practice. Start by playing along to simple rhythms, focusing on timing and accuracy. Many online resources offer free cajon tutorials with rhythmic exercises. You can also try playing along to your favorite songs. Don't be afraid to experiment, find your own style, and most importantly, have fun!

Remember: Practice makes perfect. Consistent practice, even for short periods, will significantly improve your skills. Listen to professional cajon players for inspiration and to learn new techniques.

Share:

How to Make Wooden Wall Signs with Custom Designs

Crafting Bespoke Wooden Wall Signs: A Comprehensive Guide

The creation of handcrafted wooden wall signs offers a unique opportunity to blend artistry with functionality, producing personalized home décor or bespoke commercial signage. This comprehensive guide details the process of designing and constructing custom wooden wall signs, encompassing material selection, design implementation, and finishing techniques. By following these instructions meticulously, even novice woodworkers can produce high-quality, visually appealing signs.

I. Material Selection and Preparation

A. Choosing the Right Wood

The selection of wood significantly impacts the final product's aesthetics and durability. Several factors should guide your choice:

  • Species: Hardwoods such as oak, maple, and walnut offer superior durability and a refined aesthetic, though they can be more expensive. Softwoods like pine and cedar provide a more rustic look and are more readily available and affordable. Consider the desired style and budget when making this selection.
  • Thickness: The thickness of the wood directly influences the sign's structural integrity. For smaller signs, ½-inch to ¾-inch thickness is generally sufficient. Larger signs may require thicker wood (1-inch or more) to prevent warping or sagging.
  • Grain Pattern: The direction and prominence of the wood grain can significantly impact the visual appeal of the finished sign. Straight grain is typically preferred for ease of cutting and painting, while more pronounced grain patterns can add character and visual interest.
  • Surface Quality: Examine the wood for knots, cracks, or other imperfections. While some imperfections can enhance a rustic aesthetic, significant flaws should be avoided, especially for intricate designs.

B. Preparing the Wood

Before commencing the design process, the chosen wood requires proper preparation to ensure optimal results:

  • Cutting to Size: Accurately measure and cut the wood to the desired dimensions using a saw appropriate for the chosen wood type (e.g., circular saw, miter saw, hand saw). Precise cuts are crucial for achieving a professional finish.
  • Surface Planing (Optional): For a smoother surface, particularly with rough-sawn lumber, consider planing the wood to create a more uniform surface for painting or staining. A hand plane or power planer can be used for this purpose.
  • Sanding: Sanding the wood thoroughly is essential for achieving a smooth, even surface. Begin with coarser grit sandpaper (e.g., 80-grit) and progressively move to finer grits (e.g., 120-grit, 220-grit) to eliminate scratches and imperfections. Sanding in the direction of the grain is crucial to prevent cross-grain scratches.

II. Design and Implementation

A. Conceptualizing Your Design

The design phase is critical in determining the final aesthetic. Consider the following aspects:

  • Purpose: Determine the sign's primary function. Is it for personal use, a business, or a gift? This will influence the overall design and messaging.
  • Style: Choose a style that complements its intended location and use. Options range from rustic to modern, minimalist to ornate.
  • Text and Graphics: Determine the text, font, and any graphics to be included. Keep the design clean and uncluttered to ensure readability and visual appeal. Utilize design software to create a digital mock-up before transferring it to the wood.
  • Color Palette: Select colors that complement the chosen wood and style. Consider the overall ambiance of the space where the sign will be displayed.

B. Transferring the Design

Several methods exist for transferring the design onto the wood:

  • Tracing: For simple designs, tracing with carbon paper can be effective. Ensure the design is securely fastened to the wood to prevent shifting during tracing.
  • Projection: Projectors can be used to project the design directly onto the wood. This method is particularly useful for intricate designs or large-scale projects.
  • Stenciling: Cut a stencil from sturdy material (e.g., acetate, cardboard) and apply paint through the openings to create the design. This is ideal for repetitive elements or lettering.

C. Creating the Design

Once the design is transferred, utilize appropriate tools and techniques to create it:

  • Hand-Carving: For intricate designs, hand carving with various chisels and gouges provides a unique and textured effect. This requires skill and patience.
  • Router Work: A router can be used to create raised lettering, intricate patterns, or decorative borders. Use appropriate router bits and jigs to ensure precision and safety.
  • Painting: For painted designs, use high-quality paints suitable for wood. Apply multiple thin coats for optimal coverage and even color distribution. Allow ample drying time between coats.
  • Burning: Wood burning tools can be used to create intricate designs and lettering, adding a rustic touch. Use stencils for accuracy.

III. Finishing and Installation

A. Finishing Techniques

After creating the design, applying a protective finish is crucial for longevity and aesthetic enhancement:

  • Staining: Wood stains enhance the natural grain pattern and color of the wood. Apply multiple thin coats according to the manufacturer's instructions. Allow sufficient drying time between coats.
  • Sealing: A sealant protects the wood from moisture and wear. Various sealants are available, including polyurethane, varnish, and lacquer. Choose a sealant appropriate for the wood type and intended use.
  • Waxing: Waxing provides a protective layer and a subtle sheen. It is suitable for enhancing the natural beauty of the wood and providing a smooth finish.

B. Mounting and Installation

The final step involves securely mounting the sign to the wall:

  • Hardware Selection: Choose appropriate mounting hardware based on the sign's size, weight, and the wall material. Options include screws, nails, picture hangers, or adhesive mounting strips.
  • Pre-Drilling (Recommended): Pre-drilling pilot holes prevents the wood from splitting, especially when using screws. This is especially crucial with hardwoods.
  • Leveling and Securing: Use a level to ensure the sign is perfectly aligned before securing it to the wall. Ensure the mounting hardware is securely fastened to prevent the sign from falling.

By following these detailed steps and employing appropriate techniques, you can successfully create bespoke wooden wall signs that are both visually appealing and durable. Remember to prioritize safety throughout the process and to take your time to ensure precision and high-quality craftsmanship. The end result will be a unique and cherished piece of handcrafted art.

Share:

Large Wooden Picture Frame Plans for Oversized Artwork

Building a Massive Masterpiece: Plans for a Large Wooden Picture Frame

So, you've got a seriously impressive piece of art â€" a canvas so large it practically demands its own zip code. Finding a frame to match is proving…challenging, to say the least. Forget the flimsy department store options; we're talking about crafting a frame that's as substantial and stunning as the artwork itself. Let's build a large wooden picture frame together!

Planning Your Project: Measuring Up and Material Selection

Before you even think about picking up a saw, let's get the measurements right. This is crucial for a perfectly fitting frame. Accurate measurements aren't just about aesthetics; they're the foundation of the whole project. Grab your trusty tape measure (and maybe a friend to help with the larger pieces!)

Measuring Your Artwork

Carefully measure the length and width of your artwork. Add at least 2 inches to both the length and width. This extra space will accommodate the frame's thickness and provide a nice border around your masterpiece. Write these measurements down â€" you’ll be referring to them constantly!

Choosing Your Wood

This is where you get to flex your creative muscles! The type of wood you choose dramatically impacts the look and feel of your finished frame. Consider these options:

  • Pine: Affordable, readily available, and relatively easy to work with, pine is a great starting point, especially for larger projects where cost is a factor. It accepts paint and stain well.
  • Oak: A classic choice known for its strength and beautiful grain. Oak is more expensive than pine but offers a more luxurious look. It's durable enough to withstand the weight of a large piece.
  • Walnut: Rich, dark, and elegant, walnut is a premium wood choice. Expect to pay a higher price, but the results are stunning.
  • Reclaimed Wood: Adds character and a unique story to your frame. Look for lumber from old barns or other structures â€" just be sure it's properly treated and dried.

Think about the style of your artwork and the overall aesthetic you're aiming for. A rustic artwork might pair beautifully with reclaimed wood, while a modern piece might suit a clean, simple pine frame.

Calculating Your Lumber Needs

Once you've chosen your wood and added the extra inches to your artwork measurements, you'll need to calculate the amount of lumber you'll need. Since you'll be working with potentially long lengths of wood, consider buying slightly extra to account for any imperfections or mistakes. It's always better to have a little leftover than to run short mid-project!

Cutting and Assembling Your Frame: The Heart of the Project

Now for the fun part (and the slightly more challenging part!). You'll need a few tools for this phase:

  • Miter saw: This is highly recommended for accurate 45-degree cuts. A hand saw is possible, but accuracy is paramount for a professional-looking frame.
  • Clamps: Lots of them! You'll need to hold the frame pieces together securely while the glue dries.
  • Wood glue: A high-quality wood glue is essential for a strong, lasting bond.
  • Wood screws (optional): For extra strength, especially with larger, heavier frames, consider using wood screws in addition to the glue.
  • Sandpaper (various grits): Smooth out any rough edges and ensure a flawless finish.

Making the Cuts

Using your miter saw (or hand saw), cut four pieces of wood to the length and width you calculated earlier. Make sure your cuts are precise 45-degree angles for a perfect mitered joint. Double-check your measurements before making each cut â€" a slight error can ruin the whole frame.

Assembling the Frame

Apply a generous amount of wood glue to the ends of each piece of wood where they will meet. Carefully align the pieces to form a square or rectangle (depending on your artwork’s shape), ensuring the mitered joints fit snugly. Clamp the frame tightly together, making sure the corners are perfectly aligned. Leave the clamps in place for at least an hour to allow the glue to dry completely.

For added security, you can reinforce the corners with wood screws. Pre-drill pilot holes to prevent the wood from splitting. Make sure your screws are countersunk (meaning they sit slightly below the surface of the wood) so they won't interfere with the finish.

Finishing Touches: Sanding, Staining, and Hanging

Once the glue is completely dry, you can remove the clamps. Now it's time to bring out the sandpaper. Start with a coarser grit (around 80) to remove any rough edges, then gradually move to finer grits (120, 180, and even 220) for a super-smooth finish.

Applying Stain or Paint

This is your chance to add personality to your frame. Stain brings out the natural beauty of the wood, while paint allows for a more bold and customizable look. Follow the manufacturer's instructions for the best results. Apply multiple thin coats rather than one thick coat for even coverage.

Adding Hardware

Once the finish is completely dry, it's time to add the hanging hardware. Depending on the size and weight of your frame, you may need heavy-duty D-rings or sawtooth hangers. Make sure they're securely attached and able to support the weight of your artwork and frame.

Commonly Asked Questions

  • Q: What if my artwork isn't rectangular? A: Don't worry! You can adapt these plans to create frames for oval, circular, or other shapes. You'll just need to adjust your cutting angles and potentially use more complex joinery techniques.
  • Q: How do I prevent the wood from warping? A: Use well-seasoned lumber that has a low moisture content. Properly acclimating the wood to your environment before starting the project also helps prevent warping.
  • Q: Can I use a different type of adhesive? A: Wood glue is highly recommended for strength and durability. Other adhesives may not provide the same level of bonding.
  • Q: What if I make a mistake? A: Don't panic! Woodworking involves a learning curve. If you make a mistake, try to salvage the situation, or start over. It's all part of the process!
  • Q: How do I choose the right hanging hardware? A: Consider the weight of your artwork and frame. Heavy pieces will require stronger hardware, like D-rings and wire.

Building a large wooden picture frame is a rewarding project. It takes time and patience, but the result is a stunning, custom-made frame that perfectly complements your oversized artwork. So, grab your tools, unleash your creativity, and get building!

Share:

DIY Wooden Bread Box Ideas for Making Your Own Kitchen Storage

DIY Wooden Bread Box Ideas for Making Your Own Kitchen Storage

Tired of your bread going stale faster than you can eat it? A beautiful, functional bread box is the perfect solution, and building your own is a surprisingly rewarding project! Forget mass-produced plastic containers; crafting a personalized wooden bread box lets you showcase your creativity and improve your kitchen's aesthetic. This guide provides several DIY options, from beginner-friendly projects to more challenging builds that will test your woodworking skills. Let's get started!

Simple & Rustic Bread Box: A Beginner's Project

This design utilizes readily available materials and simple joinery, making it ideal for woodworking novices. You’ll need untreated pine boards (easily sourced at most hardware stores), wood glue, and screws. Begin by cutting the boards to the desired dimensions. A rectangular box is the simplest shape; aim for a size that fits comfortably on your countertop and holds your usual amount of bread. Ensure all your cuts are precise for a clean, professional look. After assembling the sides and base using wood glue and screws, reinforce the corners with additional screws for added stability. Finally, create a hinged lid using more of the same wood and hinges. Sand down any rough edges, and finish with a food-safe oil or wax to protect the wood and enhance its natural beauty. Consider adding small feet to raise the box off the counter for better air circulation.

Elegant Farmhouse Style Bread Box: A Step Up in Complexity

For a more sophisticated look, consider a farmhouse-style bread box. This project introduces slightly more advanced techniques but remains achievable for intermediate DIYers. You'll need slightly higher-quality wood, like cedar or oak, for a richer appearance. This design often incorporates decorative elements such as routed edges, dovetail joints (for a truly impressive finish), or even a small ventilation cut-out. Pre-planning your design with sketches is crucial here. Accurate cuts and precise joinery are key to a successful outcome. Once assembled, sand thoroughly and finish with a stain or paint to match your kitchen decor. The addition of metal handles adds a final touch of elegance.

Essential Materials & Tools

Regardless of your chosen style, you’ll need these essentials:

  • Wood boards (pine, cedar, oak, etc.)
  • Wood glue
  • Screws
  • Sandpaper (various grits)
  • Wood finish (oil, wax, stain, paint)
  • Measuring tape
  • Saw (hand saw, circular saw, or miter saw)
  • Drill
  • Screwdriver
  • Clamps
  • Hinges

Creative Bread Box Enhancements

Don't be afraid to personalize your bread box! Add a chalkboard panel to the front for writing notes or fun messages. Incorporate a small window cut-out covered with glass or plexiglass for a charming peek inside. Carving simple designs into the wood adds a unique, handcrafted touch. Let your imagination run wild! Explore different wood types, finishes, and hardware to create a bread box that perfectly reflects your style and complements your kitchen's overall aesthetic.

Building your own wooden bread box is a rewarding experience that allows you to create a functional and beautiful piece for your kitchen. Remember to always prioritize safety when working with tools and wood. Enjoy the process and the satisfaction of crafting something unique and lasting!

Share:

Sustainable DIY Wooden Bread Box Ideas for Eco-Friendly Living

Sustainable DIY Wooden Bread Boxes for Eco-Friendly Living

Tired of plastic bread containers ending up in landfills? Yearning for a touch of rustic charm in your kitchen? Then building your own sustainable wooden bread box is the perfect project! This guide will walk you through creating a beautiful, functional, and eco-friendly bread storage solution using readily available materials and simple techniques. Embrace the satisfying process of crafting something useful while reducing your environmental impact â€" it's a win-win!

Choosing Your Materials: Sustainability First

The key to a truly sustainable bread box lies in material selection. Prioritize reclaimed or responsibly sourced wood. Consider visiting local salvage yards, lumber mills that practice sustainable forestry, or even checking for discarded pallets (ensure they're treated with safe, non-toxic chemicals). Hardwoods like oak, maple, or cherry offer durability and beauty, but softer woods like pine or cedar work well too, requiring slightly more careful handling during construction. For the finish, opt for natural, non-toxic oils like linseed oil or beeswax. Avoid harsh chemicals and synthetic finishes that can leach into your bread and harm the environment.

Designing Your Dream Bread Box

Before you reach for your tools, sketch out your design. Consider the size you need to accommodate your typical loaf. A simple rectangular box is easiest for beginners, but you can unleash your creativity with more complex designs. Think about incorporating details like ventilation slots for optimal bread preservation or decorative elements like carved handles or engraved patterns. Remember to account for the thickness of your chosen wood when determining dimensions for the sides, bottom, and lid.

Essential Design Considerations

To ensure your bread box functions effectively, keep these in mind:

  • Ventilation: Drill several small holes in the sides or bottom of the box to allow air circulation and prevent mold growth.
  • Lid Fit: Make sure the lid fits snugly but doesn't bind. A small gap between the lid and the box allows for air exchange.
  • Simplicity: Start with a straightforward design before tackling more intricate projects. A basic box is a great first step.

Construction Techniques: Simple Steps to Success

Once your design is finalized, gather your tools: a saw (hand saw or circular saw), sandpaper (various grits), wood glue, clamps, and your chosen finish. Carefully cut the wood pieces according to your measurements. Apply wood glue to the joints and clamp them together firmly to ensure a strong bond. Allow the glue to dry completely. Sand down any rough edges and imperfections using progressively finer grits of sandpaper. Apply your chosen natural oil finish, following the manufacturer’s instructions, for protection and beauty. Let the finish cure completely before using your new bread box.

Adding Personal Touches: Make it Yours

Personalize your bread box to reflect your style. Incorporate decorative elements like engraved designs, painted accents (using non-toxic paints), or metal hinges for a more polished look. You could even add small feet to elevate the box slightly, protecting the bottom from moisture. The possibilities are endless â€" let your creativity flow! The most important thing is to enjoy the process of creating something unique and sustainable for your kitchen.

Building your own wooden bread box is not only a rewarding experience, but it's also a statement about your commitment to eco-friendly living. You'll reduce waste, enjoy a beautiful handcrafted item, and appreciate the satisfaction of creating something lasting from sustainable materials.

Share:

Wooden Box DIY Ideas for Organizing Kitchen Utensils

Unleash Your Inner Carpenter: DIY Wooden Box Kitchen Utensil Organizers

Tired of cluttered kitchen drawers and countertops? Transform your utensil storage with a personalized, handcrafted wooden box! This article provides detailed instructions and creative ideas to build your own unique organizer, adding both functionality and rustic charm to your kitchen. Forget generic plastic containers; embrace the beauty and durability of wood to create a piece you’ll cherish for years to come. We'll guide you through the process, from selecting the right wood to adding those personal touches that truly make it your own.

Choosing Your Wood and Tools

The foundation of your project rests on choosing the right wood. Consider pine for its affordability and ease of working, or opt for the richer look and durability of hardwoods like oak or maple. The choice depends on your budget and desired aesthetic. Before you even pick up a saw, gather your essential tools. This includes a measuring tape, saw (hand saw or circular saw), sandpaper (various grits), wood glue, clamps, screws or nails, and a screwdriver or hammer. For a truly polished look, consider adding wood stain, varnish, or paint to your supply list.

Designing Your Perfect Utensil Organizer

Before you begin cutting, plan your design! Sketch out your dimensions, considering the size and quantity of utensils you need to store. Will it be a single large box, or multiple smaller compartments? Think about the placement of dividers for spoons, forks, knives, and spatulas. Do you want a simple, sleek design or something more ornate? Measure your drawer or countertop space carefully to ensure a perfect fit. Consider adding a handle for easy portability or decorative elements like inlays or carvings for a unique touch.

Ideas for Compartmentalization

Get creative with your internal design! Here are some exciting options:

  • Individual slots: Create separate slots for each utensil type for ultimate organization.
  • Adjustable dividers: Use removable or adjustable dividers to customize the space based on your utensil collection.
  • Drawer-style compartments: Build small drawers within the larger box for easy access to frequently used items.
  • Layered compartments: Create stacked levels for efficient use of vertical space.

Building Your Wooden Box

With your design finalized, carefully cut your wood pieces to the exact dimensions. Use your saw to create the sides, bottom, and top of the box. Apply wood glue to the joints and secure them with screws or nails, ensuring tight, even connections. Use clamps to hold the pieces firmly in place while the glue dries completely. Once dry, carefully sand down any rough edges and imperfections, ensuring a smooth surface for finishing.

Finishing Touches and Personalization

Now comes the fun part! Once your box is assembled and sanded, add your finishing touches. Apply a stain or paint to enhance the wood's natural beauty or create a vibrant, customized look. Apply varnish or sealant for protection and durability. Consider adding personalized touches like engraving your initials, burning a decorative design, or attaching metal handles. Let your creativity flow!

Building your own wooden utensil organizer is a rewarding experience. It's a chance to showcase your craftsmanship while adding a touch of handmade charm to your kitchen. So, gather your tools, choose your wood, and begin creating your perfect kitchen organizer today!

Share:

Handmade Wooden Box Designs for Special Gifts

Unboxing the Possibilities: Handmade Wooden Box Designs for Special Gifts

Hey there! So you're looking for a truly special way to present a gift? Forget those generic gift bags â€" let's talk about the magic of handmade wooden boxes! They're not just containers; they're beautiful, lasting keepsakes that elevate any present to a whole new level. And the best part? The design possibilities are endless! Let's dive into some inspiring ideas.

Choosing the Perfect Wood: A Foundation of Style

The type of wood you choose drastically impacts the final look and feel of your box. Think of it as choosing the right canvas for a painting â€" the wood sets the tone.

Classic & Elegant Choices:

Cherry wood is known for its rich, reddish-brown hue and fine grain, giving a sophisticated and timeless appeal. Imagine a cherry box holding a beautiful piece of jewelry or a handwritten letter. Mahogany, with its deep, luxurious color, is another fantastic choice for something truly special. It exudes warmth and elegance.

Rustic & Charming Options:

For a more rustic and charming feel, pine or oak are excellent options. Pine offers a lighter, more approachable look, perfect for gifts with a cozy or whimsical vibe. Oak, on the other hand, is incredibly strong and durable, with gorgeous grain patterns that add character. A rustic oak box would be perfect for a bottle of fine wine or a collection of artisanal chocolates.

Unique & Unexpected Woods:

Want to be truly unique? Consider woods like walnut, known for its dark, almost chocolatey color and intricate grain patterns, or maple, with its lighter color and often striking bird's-eye figure. These woods offer an element of surprise and sophistication.

Design Elements: Adding Your Personal Touch

Once you've selected your wood, the real fun begins â€" designing the box itself! This is where you can infuse your creativity and make it truly personal.

Shape & Size:

Consider the size and shape of your gift. A small, square box is perfect for jewelry, while a larger, rectangular one might be ideal for a bottle of wine or a set of artisan soaps. You could even get creative with unusual shapes â€" a heart-shaped box for a romantic gift or a hexagon box for something modern and unique.

Finishing Touches:

The finish is what really brings the wood to life. A simple oil finish will enhance the natural beauty of the grain, while a stain can add depth and color. You could even add a layer of clear lacquer for extra protection and shine.

Inlay & Carving:

For a truly bespoke touch, consider adding intricate inlay work using contrasting woods or even precious metals. Carving designs into the wood can add a personalized touch. Think initials, meaningful symbols, or even a simple geometric pattern. The possibilities are as limitless as your imagination!

Hardware & Hinges:

Don't underestimate the impact of the hardware! Choose hinges and latches that complement the overall design. You could go for simple, rustic brass hinges or more ornate, antique-style ones. A small, engraved brass clasp can add a touch of elegance.

Burning & Painting:

For a more rustic or whimsical approach, wood burning can add beautiful detail. You can create intricate designs or simply add a personalized message. Alternatively, painting can add pops of color or create a unique artwork on the box.

Ideas for Specific Gifts

Here are some ideas to get your creative juices flowing:

For the Wine Lover:

A sleek, rectangular box made from dark mahogany or walnut, with a simple, elegant latch. You could even line the inside with velvet to protect the bottle.

For the Jewelry Enthusiast:

A small, intricately carved cherry wood box with a velvet lining. Consider adding a small mirror to the inside of the lid.

For the Bookworm:

A rustic pine box, slightly larger than a standard book, with a simple latch. You could even add a small leather handle for easy carrying.

For the Tea Drinker:

A small, square box made from light-colored wood, perhaps with a painted floral design on the lid. Perfect for holding a selection of loose-leaf teas.

For the Newlyweds:

A heart-shaped box made from richly colored wood, inlaid with mother-of-pearl or other precious materials. A truly memorable keepsake for their special day.

Beyond the Box: Presentation Matters!

Even the most beautiful handmade wooden box deserves a little extra love in the presentation department. Consider adding:

  • A handwritten card expressing your heartfelt message.
  • A small sprig of dried flowers or a piece of ribbon tied around the box.
  • A piece of luxurious tissue paper inside the box to further protect the gift.
  • A personalized label or tag with the recipient's name or a special message.

Frequently Asked Questions

Let's address some common questions about creating these beautiful boxes.

Q: What tools do I need to make a wooden box?

A: The tools you need will depend on the complexity of your design. At a minimum, you'll need saws (hand saw or power saw), chisels, sandpaper, clamps, and wood glue. More complex designs may require additional tools like a router or wood lathe.

Q: How long does it take to make a wooden box?

A: This varies greatly depending on the design and your experience level. A simple box might take a few hours, while a more intricate design could take several days or even weeks.

Q: Where can I find wood for my box?

A: Lumberyards, craft stores, and online retailers are all great places to source wood. Make sure to choose wood that is suitable for your project and is properly seasoned.

Q: Can I customize the inside of the box?

A: Absolutely! You can line the inside with velvet, felt, or other fabrics to create a luxurious finish and protect your gift. You can also add compartments or dividers to organize items.

Q: What if I'm not skilled in woodworking?

A: Don't worry! There are tons of resources available online â€" tutorials, videos, and patterns â€" that can guide you through the process. Start with a simpler design and gradually build your skills.

Creating handmade wooden boxes is a rewarding experience. It’s a chance to show your love and appreciation in a unique and memorable way. So get creative, have fun, and enjoy the process of bringing your design to life!

Share:

Stylish DIY Wooden Bread Box Ideas for Urban Kitchens

Stylish DIY Wooden Bread Box Ideas for Urban Kitchens

The urban kitchen, often characterized by limited space and a desire for both functionality and aesthetic appeal, presents a unique challenge when it comes to bread storage. Pre-made bread boxes, while readily available, can be costly and may not perfectly complement the individual style of a modern urban dwelling. This article explores the rewarding and aesthetically pleasing alternative: crafting a bespoke wooden bread box. We will delve into design considerations, material selection, construction techniques, and finishing options, empowering you to create a stylish and functional bread storage solution perfectly tailored to your urban kitchen.

Design Considerations: Form Meets Function in the Urban Space

Before embarking on the construction process, careful consideration of design elements is crucial. The design should seamlessly integrate with the existing kitchen aesthetic while optimizing space utilization within the often-constrained urban environment. Several key aspects warrant detailed attention:

Size and Dimensions:

The dimensions of your bread box must be carefully planned. Consider the typical size of loaves you purchase, allowing ample space without excessive wasted volume. Measure the available counter space or shelving where the bread box will reside to ensure a proper fit. For smaller kitchens, a slimmer, vertically oriented design might be more suitable than a larger, horizontally oriented one. Careful measurements and sketches are imperative to avoid errors during construction.

Style and Aesthetics:

The style of your DIY bread box should complement the overall design of your urban kitchen. Consider the existing color palette, materials used in cabinetry and countertops, and prevalent design themes (e.g., minimalist, rustic, industrial). A minimalist design might feature clean lines and a simple, unadorned exterior, while a rustic design might incorporate distressed wood and metal accents. An industrial style could utilize reclaimed wood and exposed metal hardware.

Functionality and Features:

Beyond aesthetics, functionality is paramount. The bread box should effectively preserve the freshness of your bread. Consider incorporating features such as:

  • Ventilation: Adequate ventilation is crucial to prevent mold growth. This can be achieved through strategically placed holes or slats in the sides or bottom of the box.
  • Lid Design: A well-designed lid ensures easy access to the bread while preventing moisture and airborne particles from entering the box. Consider hinges for secure closure and a handle for convenient lifting.
  • Interior Lining (Optional): An interior lining, such as a removable canvas or linen insert, can further enhance bread preservation by absorbing excess moisture.

Material Selection: Choosing the Right Wood for Your Bread Box

The choice of wood significantly impacts the final look and durability of your bread box. Consider factors such as aesthetic appeal, workability, and resistance to moisture. Several wood types are suitable for this project:

Hardwoods:

Hardwoods, such as oak, maple, cherry, and walnut, offer superior durability and resistance to wear and tear. They are aesthetically pleasing and can be finished to achieve a variety of looks. However, hardwoods can be more challenging to work with for beginners and are generally more expensive.

Softwoods:

Softwoods, such as pine and cedar, are more readily available and less expensive than hardwoods. They are relatively easy to work with, making them a good choice for beginners. However, softwoods are more susceptible to dents and scratches and may require more careful handling and finishing to ensure longevity. Cedar, in particular, has natural insect-repellent properties, which might be advantageous for bread storage.

Reclaimed Wood:

Using reclaimed wood is an eco-friendly and aesthetically unique option. Reclaimed wood adds character and a sense of history to the bread box, aligning well with the sustainable ethos often associated with urban living. However, reclaimed wood may require more preparation and care to ensure its suitability for this project, as it might contain imperfections or require stabilization.

Construction Techniques: Building Your Custom Bread Box

The construction process involves several key steps, requiring basic woodworking skills and tools. The specific techniques will vary based on your chosen design and wood type. However, general steps include:

Cutting and Shaping:

Precisely cut the wood pieces according to your design plans. Utilize a miter saw, circular saw, or hand saw to achieve clean, accurate cuts. Sand the edges and surfaces to ensure a smooth finish. For more intricate designs, consider using a router for shaping or decorative elements.

Assembly:

Assemble the box using appropriate joinery techniques, such as rabbet joints, dado joints, or mortise and tenon joints for a strong and durable structure. Wood glue and screws or dowels can be used to reinforce the joints. Ensure proper alignment and clamping for strong adhesion.

Finishing Touches:

Once the box is assembled, sand all surfaces to a smooth finish. Apply a suitable finish to protect the wood and enhance its aesthetic appeal. Options include oil-based finishes, water-based polyurethane, or natural waxes. Consider the desired look and level of protection when choosing a finish. For a more rustic look, a slightly distressed finish may be preferable. For a modern look, a clear or semi-gloss finish is more appropriate. Install hinges and a handle, completing the functional aspects of the bread box.

Finishing Options: Enhancing the Aesthetic Appeal

The final finish significantly impacts the overall aesthetic appeal of your DIY bread box. Consider these options:

Natural Finishes:

Natural oil finishes, such as linseed oil or tung oil, enhance the natural beauty of the wood grain while offering some protection against moisture. These finishes provide a warm, rustic feel, well-suited for kitchens with a natural or farmhouse aesthetic.

Protective Finishes:

Polyurethane finishes offer superior protection against moisture and scratches, making them a practical choice for busy kitchens. They are available in various sheens, from matte to high-gloss, allowing you to customize the look to match your kitchen's style.

Distressed Finishes:

For a more rustic or vintage look, consider distressing the wood by creating artificial wear and tear. Techniques include using sandpaper to create scuffs and scratches, or applying a wash of darker paint to highlight the wood grain.

Color Staining:

Wood stains allow you to customize the color of your bread box while still showcasing the wood grain. A wide range of colors are available to match any kitchen decor.

Creating a DIY wooden bread box for your urban kitchen is a rewarding project that allows for personalized design and functionality. By carefully considering design elements, material selection, construction techniques, and finishing options, you can craft a stylish and practical bread storage solution perfectly tailored to your home. The process allows for creative expression and contributes to a unique and personalized living space within the often-limited confines of urban dwelling.

Share:

Wooden Box DIY Ideas for Pet Storage Solutions

Unleash Your Inner Carpenter: DIY Wooden Box Pet Storage Solutions!

Hey there, fellow pet lovers! Are you tired of pet toys scattered everywhere? Food bowls taking over your kitchen counter? Leashes tangled into a Gordian knot in the hallway? I get it! Pet ownership is amazing, but keeping things organized can feel like a never-ending battle. That's why I'm thrilled to share some super fun and practical DIY wooden box ideas for all your pet storage needs. Let's get crafty and create some seriously stylish (and functional!) solutions!

Choosing Your Wood & Tools: The Foundation of Your Project

Before we dive into the designs, let's talk about the essentials: the wood and the tools. You don't need to be a master carpenter for this! Seriously.

Wood Types: Finding the Perfect Fit

For these projects, you have lots of options. Pine is inexpensive and relatively easy to work with, perfect for beginners. Cedar is a bit pricier but offers a lovely aroma and natural pest-repelling properties â€" a win-win if you store things like blankets or bedding. Reclaimed wood adds a rustic charm, giving your boxes a unique, vintage feel. Just make sure whatever you choose is appropriately treated for indoor use if you're not using exterior wood specifically.

Essential Tools: Gathering Your Arsenal

You won't need a whole workshop, but here's what'll make your life easier:

  • Measuring tape
  • Saw (hand saw, circular saw, or jigsaw â€" depending on your comfort level and the complexity of your design)
  • Screwdriver or drill
  • Screws or nails
  • Sandpaper (various grits for smoothing)
  • Wood glue
  • Clamps (helpful for holding pieces together while the glue dries)
  • Safety glasses and a dust mask

Optional, but highly recommended: A wood stain or paint to personalize your boxes and protect the wood.

DIY Wooden Box Ideas: From Simple to Stunning

Now for the fun part! Here are a few ideas to spark your creativity:

The Classic Toy Box

This is a straightforward project perfect for beginners. Build a simple rectangular box with a lid. You can leave it plain, paint it a vibrant color, or even decoupage it with fun pet-themed images. For extra durability, consider adding metal corner protectors. This is a great place to store those ever-multiplying squeaky toys!

The Divided Treat & Toy Organizer

Take your basic box design a step further by adding internal dividers. This creates separate compartments for different types of treats, toys, or even grooming supplies. You can create dividers using more pieces of wood or even sturdy cardboard, covered with fabric or contact paper for a nice finish. Think of it as a mini pet supply buffet!

The Elevated Food Bowl Station

Say goodbye to messy spills with an elevated food and water bowl station. Build a shallow box with a slightly raised platform in the center. Cut out spaces for the bowls to sit securely, ensuring they're easy to clean and refill. This also makes mealtimes easier on your pet's neck and joints, especially for senior pets.

The Leash & Collar Organizer

Keep your leashes and collars neatly tucked away with a wall-mounted box. Add hooks or pegs inside to hang the leashes and collars. A small door or lid helps keep things dust-free. This will add a touch of rustic charm while preventing those frustrating leash tangles.

The Stylish Storage Bench

Go big with a storage bench! This is a more ambitious project, but well worth the effort. Build a sturdy bench with a hinged lid to reveal a spacious storage area for blankets, extra food, or even a pet bed. Imagine the possibilities! This will also improve the aesthetics of your home.

Adding Personality: Personalization Tips

Don't forget the finishing touches! Once your box is built, you can personalize it to match your pet's personality or your home's décor. Here are some ideas:

  • Paint: Choose a color that complements your pet's fur or your room’s style.
  • Stain: For a more natural look, use a wood stain in a rich color like walnut or cherry.
  • Decoupage: Add fun pet-themed images or your pet's photos.
  • Stencils: Create unique patterns or add your pet's name.
  • Handles: Add decorative handles or knobs for easy opening and closing.

Beyond the Basics: Advanced Techniques

Feeling ambitious? Here are a few ideas to take your DIY projects to the next level:

  • Incorporate wheels: Add casters to your toy box or storage bench for easy mobility.
  • Use different wood types: Combine different types of wood for a unique look.
  • Add hinges and latches: For a more professional finish, use high-quality hinges and latches.
  • Carving or burning designs: Get creative with wood burning or carving techniques to add a personal touch.

Frequently Asked Questions (FAQ)

Q: What kind of wood is best for pet storage boxes?

A: Pine is affordable and easy to work with. Cedar offers a pleasant aroma and natural pest-repelling qualities. Hardwoods like oak are durable but more challenging to work with.

Q: Do I need to seal the wood?

A: Yes, sealing the wood is important to protect it from moisture and scratches, extending the life of your storage box. Use a sealant appropriate for indoor use.

Q: How do I make sure my box is sturdy enough?

A: Use appropriate screws or nails, ensuring they are long enough to securely fasten the wood pieces. Consider using wood glue in addition to fasteners for extra strength. Reinforce corners as needed.

Q: What if I'm not very good at woodworking?

A: Start with a simple design like a basic toy box. There are many online tutorials and resources available to help you through each step. Don't be afraid to ask for help from a more experienced woodworker if you get stuck.

Q: Can I customize the size of the boxes?

A: Absolutely! Measure the space where you plan to place the box and adjust the dimensions accordingly.

So there you have it! Hopefully, this has inspired you to get crafting and create some amazing pet storage solutions. Remember, the most important thing is to have fun and personalize your projects to reflect your pet's unique personality and your style. Happy building!

Share:

Wooden Box DIY Ideas for Stylish Bathroom Organization

Elevating Bathroom Aesthetics and Functionality: A Comprehensive Guide to DIY Wooden Box Organization

The bathroom, often a space constrained by both size and functionality, frequently suffers from a lack of organized storage. Clutter can quickly accumulate, detracting from the overall aesthetic and hindering efficient use of the space. However, with a touch of creativity and a few simple woodworking skills, the humble wooden box can be transformed into a stylish and highly effective organizational solution. This guide explores diverse design possibilities for DIY wooden boxes, tailored to enhance bathroom storage and elevate the overall ambiance.

Choosing the Right Wood and Tools: A Foundation for Success

The success of any DIY project hinges on selecting appropriate materials and tools. For bathroom-specific wooden boxes, certain woods are better suited than others due to their resistance to moisture and durability. Consider these options:

Wood Selection

Cedar is a popular choice for its natural insect-repellent properties and pleasant aroma, making it ideal for storing linens or toiletries. Pine offers a more budget-friendly option, providing a soft, workable surface, though it requires proper sealing to protect against moisture. Mahogany, while more expensive, boasts superior water resistance and a luxurious aesthetic. For increased durability and water resistance, consider using treated lumber specifically designed for outdoor applications. Always ensure the wood is properly sanded to a smooth finish before proceeding.

Essential Tools

Gathering the necessary tools beforehand ensures a smooth and efficient construction process. Essential tools include:

  • Measuring tape and pencil
  • Hand saw or circular saw
  • Wood glue
  • Clamps
  • Sandpaper (various grits)
  • Wood stain or paint (and brushes)
  • Sealer (water-based polyurethane is recommended for bathrooms)
  • Screws or nails (and screwdriver or hammer)
  • Optional: Router for decorative edges

Having these tools readily available minimizes interruptions and ensures a seamless workflow.

Diverse Design Concepts for Bathroom Wooden Boxes

The versatility of wooden boxes allows for a wide range of designs, catering to individual needs and bathroom aesthetics. Consider these ideas:

Floating Shelves with Built-in Boxes

Instead of standalone boxes, integrate them into a floating shelf system. Construct a simple shelf using sturdy wood and attach small, compartmentalized wooden boxes to the underside. This creates hidden storage for items like cotton balls, Q-tips, or medications, while maintaining a clean and uncluttered countertop.

Drawer-Style Storage Boxes

For larger items or increased storage capacity, create drawer-style boxes. These can be designed to stack, creating a tower of storage, or placed side-by-side for a more horizontal approach. Consider adding small metal drawer pulls for an added touch of elegance.

Open-Top Compartmentalized Boxes

Perfect for displaying frequently used items, open-top boxes offer easy access while maintaining an organized appearance. Create compartments within the box using dividers, allowing for segregation of smaller items such as makeup brushes, hair accessories, or cotton swabs.

Lidded Boxes for Concealed Storage

For items you want to keep hidden, build lidded boxes. These are ideal for storing medications, personal items, or extra toiletries. Consider adding hinges and a latch for a more secure closure. For an enhanced aesthetic, inlay decorative elements or use contrasting wood types for the lid.

Multi-Tiered Storage Towers

Maximize vertical space by creating a multi-tiered storage tower using several stacked boxes. Each box can be designed for a specific purpose, like storing towels, bath bombs, or cleaning supplies. Consider using different wood stains or paints to visually differentiate between tiers and their contents.

Enhancing Aesthetics: Finishes and Decorative Elements

The visual appeal of the wooden boxes significantly impacts the overall bathroom design. Consider these finishing techniques and decorative elements:

Stain Selection

Choose a stain that complements the existing bathroom décor. Darker stains create a more sophisticated look, while lighter stains offer a brighter, more airy feel. Consider testing different stains on scrap wood to ensure you achieve the desired color.

Paint Application

Painting provides another avenue for customization. Choose paint colors that enhance the bathroom’s color scheme. Consider using a high-gloss paint for a sleek and modern appearance, or a matte finish for a more rustic feel. Remember to apply a primer before painting for better adhesion and a more even finish.

Decorative Elements

Elevate the aesthetic further by incorporating decorative elements. Consider these options:

  • Inlays: Use contrasting wood types to create intricate patterns or designs.
  • Etching: Etch simple designs onto the wood using a router or specialized tools.
  • Hardware: Add decorative hinges, latches, or drawer pulls that match the bathroom’s style.
  • Stencils: Use stencils to create unique patterns or designs on the boxes using paint or stain.

Sealing and Protection: Ensuring Longevity in a Humid Environment

Given the humid environment of a bathroom, proper sealing is crucial for the longevity of your wooden boxes. This step protects the wood from moisture damage, preventing warping, cracking, and mildew growth.

Water-Based Polyurethane

Apply several coats of water-based polyurethane sealer to all surfaces of the wooden boxes. Allow each coat to dry completely before applying the next. This creates a protective barrier that repels moisture, ensuring the durability of your DIY creations.

Regular Maintenance

Even with proper sealing, regular maintenance is vital. Wipe down the boxes periodically to prevent the accumulation of dust and moisture. Reapply a fresh coat of sealer every few years to maintain maximum protection.

By carefully selecting materials, employing creative design concepts, and diligently applying protective finishes, you can transform simple wooden boxes into stylish and functional storage solutions, significantly enhancing both the organization and aesthetic appeal of your bathroom. The process itself is a rewarding experience, allowing you to create bespoke storage tailored to your specific needs and preferences.

Share:

Wooden Bread Box DIY Ideas for Small Kitchen Spaces

Maximize Your Tiny Kitchen: DIY Wooden Bread Box Ideas

Cramped kitchen? Don't let limited counter space dictate your baking habits! A bread box is a kitchen essential, keeping your loaves fresh and your counters clutter-free. But store-bought options can be bulky and expensive. This article empowers you to build your own stylish and space-saving wooden bread box, perfectly tailored to your small kitchen's needs. We'll explore different designs, materials, and construction techniques to help you create the perfect addition to your culinary haven.

Choosing the Right Design for Your Space

Before you pick up a saw, carefully consider your kitchen's layout and aesthetic. A small kitchen demands a bread box that's both functional and visually appealing without overwhelming the space. Think vertically! Tall, narrow boxes maximize vertical space, a true boon for small kitchens. Consider a slimline design that fits neatly between appliances or in a corner. Alternatively, a wall-mounted bread box frees up valuable counter space entirely. Explore online resources for inspiration; Pinterest and Instagram are treasure troves of DIY projects. You'll find countless examples of rustic, modern, and farmhouse-style bread boxes, all adaptable to your needs.

Materials and Tools: Gathering Your Arsenal

The beauty of DIY is the flexibility it offers. Choose your preferred wood type â€" pine offers affordability and ease of workability, while hardwoods like oak or cherry provide a more luxurious look and durability. For a rustic charm, consider reclaimed wood. Remember to source appropriately sized wood planks based on your chosen design. Beyond wood, you'll need essential tools. This includes a saw (circular saw or hand saw), sandpaper (various grits), wood glue, clamps, screws, and a screwdriver. Consider adding a finish â€" paint, stain, or varnish â€" to protect your bread box and enhance its aesthetic appeal. Don't forget measuring tape and a pencil for precise marking!

Essential Tools Checklist:

  • Saw (circular or hand saw)
  • Sandpaper (various grits)
  • Wood glue
  • Clamps
  • Screws
  • Screwdriver
  • Measuring tape
  • Pencil

Simple DIY Bread Box Construction Techniques

Numerous techniques exist for building a bread box, from simple box constructions to more intricate designs with doors and latches. For beginners, a simple box design is ideal. Start by cutting your wood planks to the desired dimensions. Precise measurements are key! Next, use wood glue and screws to assemble the box, ensuring square corners. Clamp the pieces securely while the glue dries. Once dry, sand down any rough edges and apply your chosen finish. For added functionality, consider adding small ventilation holes to prevent moisture buildup. You can also incorporate a simple hinged lid or door for easy access. Online tutorials provide step-by-step instructions for various complexity levels, guiding you through each stage of the process.

Adding Personal Touches: Express Your Creativity

Don't be afraid to personalize your bread box! Incorporate unique details that reflect your style. Consider adding decorative elements like carved designs, painted accents, or metal hardware. You could even repurpose old knobs or handles for a vintage look. Adding a chalkboard surface on the front allows you to write down the bread type and baking date. A simple stencil and paint can create eye-catching patterns. The possibilities are endless! Let your imagination run wild and create a bread box that's as unique as you are.

Building your own wooden bread box is a rewarding experience that saves you money and adds a touch of homemade charm to your small kitchen. So grab your tools, choose your design, and get crafting! You'll be enjoying fresh bread from your custom-built bread box in no time.

Share:

Discover the Top DIY Wooden Bread Box Ideas for Your Home

Top DIY Wooden Bread Box Ideas for Your Home

The humble bread box, once a staple in every kitchen, is experiencing a resurgence in popularity. Far from being merely functional, a handcrafted wooden bread box adds a touch of rustic charm and personalized style to any home. This article explores several DIY wooden bread box ideas, guiding you through the design process, material selection, and construction techniques to create a unique and practical addition to your kitchen.

Choosing Your Bread Box Design: A Symphony of Style and Function

Before embarking on your DIY journey, consider the overall aesthetic you wish to achieve. The design of your bread box will significantly impact its final appearance and functionality. Several key factors merit careful consideration:

Style Considerations:

The style of your bread box should complement your existing kitchen décor. A rustic farmhouse kitchen might benefit from a simple, boxy design crafted from reclaimed wood, emphasizing natural imperfections. A modern, minimalist kitchen might prefer a sleek, streamlined box with clean lines and a smooth finish. Consider incorporating elements like:

  • Rustic Charm: Use distressed wood, visible knots, and a natural finish to create a vintage feel.
  • Modern Minimalism: Opt for clean lines, smooth surfaces, and a neutral color palette.
  • Shaker Style: Embrace simple, functional design with recessed panels and understated hardware.
  • Country Cottage: Incorporate decorative elements like painted floral designs or whimsical handles.

Functional Considerations:

Beyond aesthetics, the functionality of your bread box is paramount. Key functional aspects include:

  • Size and Capacity: Determine the appropriate size based on your bread consumption. A larger family will require a more substantial box.
  • Ventilation: Adequate ventilation is crucial to prevent mold and mildew. Consider incorporating air vents or slats in the design.
  • Accessibility: Ensure the bread is easily accessible without having to remove the entire lid or front panel. A hinged lid or sliding front are popular choices.
  • Material Choice: Select a wood type appropriate for food storage. Hardwoods like oak or maple are durable and less prone to warping. Cedar is naturally antimicrobial but can impart a slight aroma to the bread.

Materials and Tools: Equipping Your Workshop

Creating a high-quality wooden bread box requires careful material selection and the right tools. The following list provides a comprehensive overview:

Wood Selection:

The choice of wood significantly impacts the final product's durability and aesthetics. Consider the following options:

  • Hardwoods (Oak, Maple, Cherry): Offer superior durability and resistance to warping. They can be more expensive than softwoods.
  • Softwoods (Pine, Fir): More affordable but prone to warping if not properly sealed. Suitable for simpler designs.
  • Reclaimed Wood: Adds character and a unique touch. Ensure the wood is properly cleaned and treated before use.

Essential Tools:

A well-equipped workshop is crucial for successful woodworking. Gather the following tools:

  • Measuring Tape and Pencil: Accurate measurements are fundamental to precise cuts.
  • Circular Saw or Hand Saw: For cutting the wood to size.
  • Wood Plane or Sander: To smooth the surfaces and edges.
  • Drill and Drill Bits: For creating pilot holes and attaching hinges and handles.
  • Screwdriver: To secure the components.
  • Clamps: To hold the pieces together during assembly.
  • Wood Glue: For robust joints.
  • Wood Finish (Oil, Varnish, Paint): To protect the wood and enhance its appearance.
  • Hinges and Handles: Choose aesthetically pleasing and functional hardware.

Construction Techniques: Bringing Your Vision to Life

Several construction techniques can be employed, ranging from simple box designs to more elaborate creations. The specific method will depend on your chosen design and skill level.

Simple Box Design:

This is a great starting point for beginners. It involves cutting the wood to size, assembling the sides, bottom, and top, and attaching a hinged lid or a sliding front. Ensure all joints are well-glued and secured with screws for extra stability. Properly sealing the wood is essential to prevent warping and moisture damage. Consider adding ventilation slats to the sides or bottom.

More Advanced Designs:

More experienced woodworkers may opt for more complex designs incorporating dovetail joints, mortise and tenon joints, or intricate carving. These techniques enhance the structural integrity and aesthetic appeal. Detailed plans and instructions can be found online or in woodworking books. Remember to meticulously plan your cuts and ensure accurate measurements to achieve precise joinery.

Finishing Touches: Enhancing the Aesthetics

Once the bread box is assembled, the finishing touches add the final flourish. This stage encompasses sanding, applying a protective finish, and adding hardware.

Sanding and Finishing:

Thorough sanding is essential to achieve a smooth surface. Start with coarser grit sandpaper and gradually progress to finer grits. Apply a protective finish like oil, varnish, or paint to protect the wood from moisture and enhance its durability and appearance. Multiple coats may be necessary for optimal protection.

Hardware Selection and Installation:

Choose hinges and handles that complement the bread box's style. Install the hinges securely, ensuring smooth operation of the lid or front. Attach the handles firmly, ensuring they are positioned for comfortable use. Consider adding decorative elements like metal accents or custom-made handles to further personalize your bread box.

Safety Precautions: Working with Wood Safely

Woodworking involves potential hazards. Always prioritize safety by taking the following precautions:

  • Wear safety glasses: To protect your eyes from flying debris.
  • Use hearing protection: When operating power tools.
  • Work in a well-ventilated area: To avoid inhaling dust and fumes from finishes.
  • Keep your work area clean and organized: To prevent accidents.
  • Follow the manufacturer's instructions for all tools and materials: To ensure safe operation.

Creating a DIY wooden bread box is a rewarding project that combines creativity, craftsmanship, and functionality. By carefully considering the design, selecting appropriate materials, and employing safe construction techniques, you can craft a unique and beautiful addition to your kitchen that will be enjoyed for years to come.

Share:

Népszerű bejegyzések

Search This Blog

Üzemeltető: Blogger.

Blog Archive

Recent Posts